Every fill you get on an exchange is priced twice: once by the market, once by the fee schedule. Which fee you pay, maker or taker, is not a setting you choose. It is decided by how your order meets the order book. In arbitrage that decision is effectively made for you, and it is made twice.
What makes an order a maker or a taker
- Maker. You post a limit order that does not fill immediately. It rests on the book, adds depth, and waits for someone else to trade against it. Because you supplied liquidity, the rate is lower, sometimes zero.
- Taker. Your order fills right away against orders already sitting there: a market order, or a limit order priced through the spread. You removed depth, so the rate is higher.
Maker and taker are roles, not account types or products. The same account, on the same pair, can pay the maker rate on one order and the taker rate on the next minute's order. What changes is the behaviour of the order.
Why an arbitrage round trip is two taker fills
Every opportunity on ArbiHunt is built from two prices you can actually hit right now: the lowest ask on the cheaper exchange and the highest bid on the pricier one. Both appear on the opportunity page, one per leg. Those are taker prices by definition, because they are the resting orders you would consume.
That gives you two taker fills per round trip:
- Buy leg: you lift the lowest ask on the cheap venue. Taker.
- Sell leg: you hit the highest bid on the pricier venue. Taker.
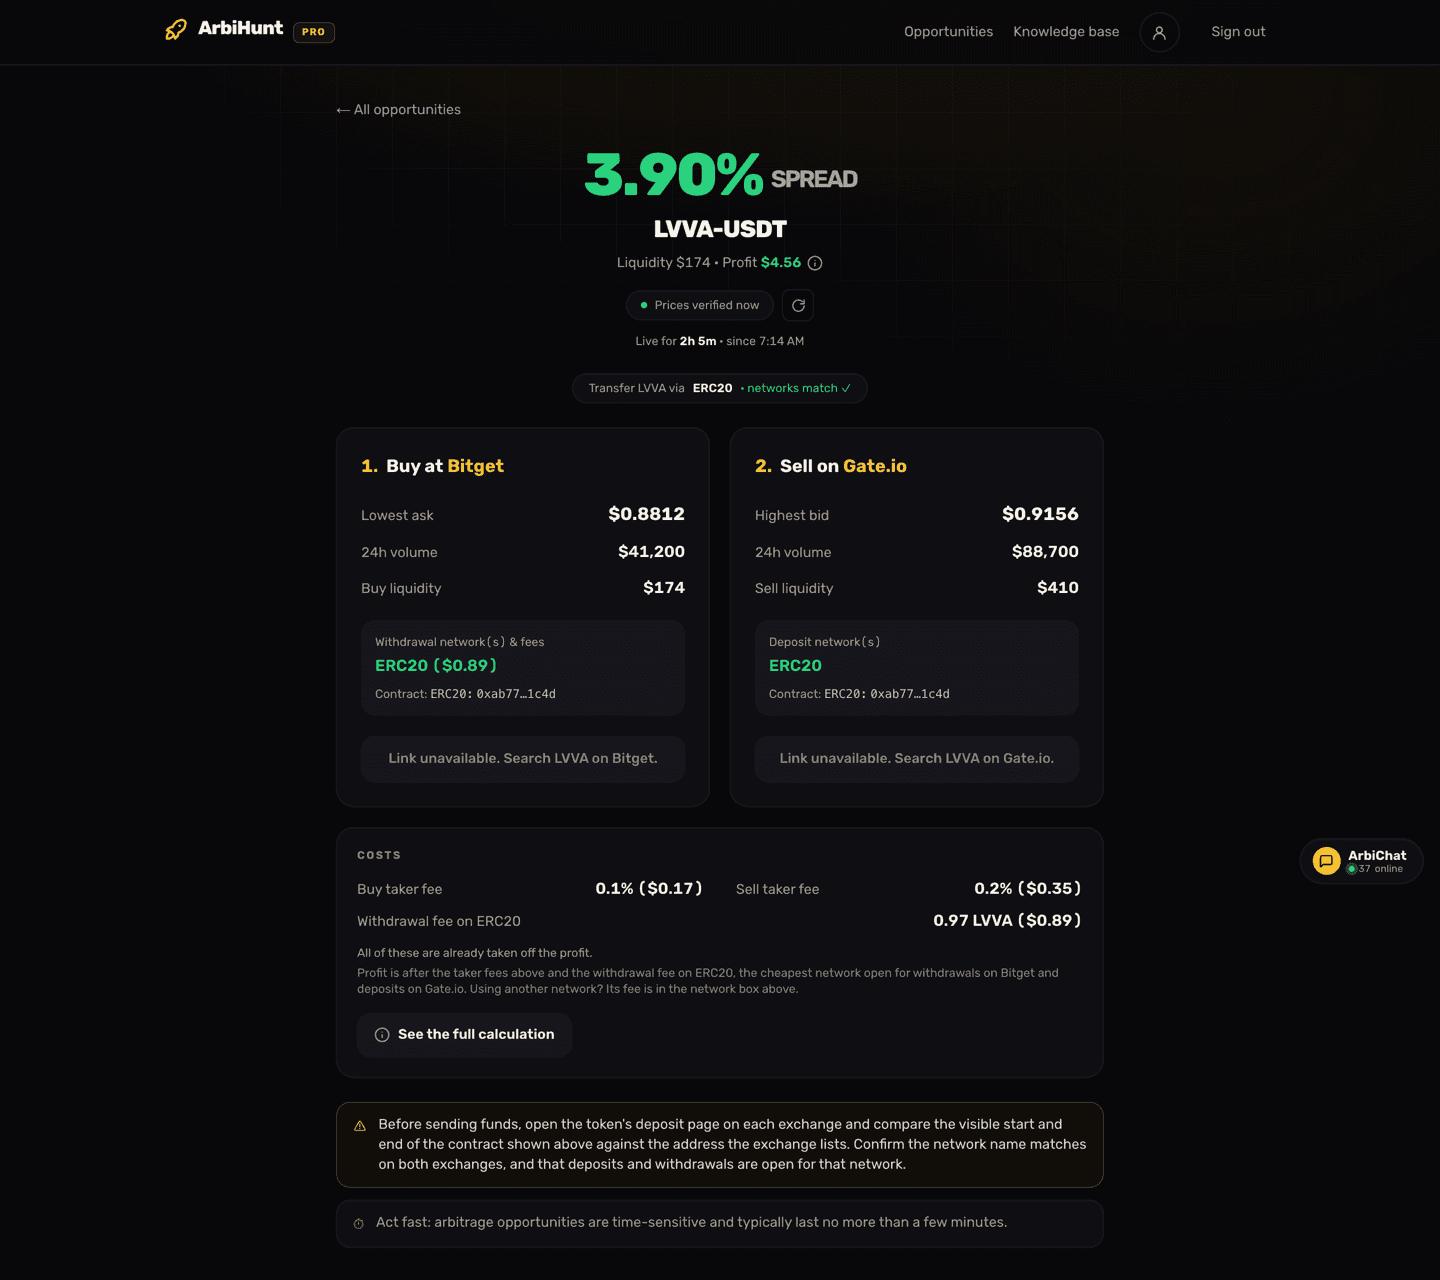
The alternative is to post your own limit order and wait for the market to come to you. But the whole premise of the trade is that the two venues currently disagree, and that disagreement is what you are paid to remove. The opportunity page tells readers directly that these gaps are time-sensitive and typically last no more than a few minutes; the board itself re-scans roughly every 30 seconds. That is not a timescale that rewards patience.
What a taker leg actually costs
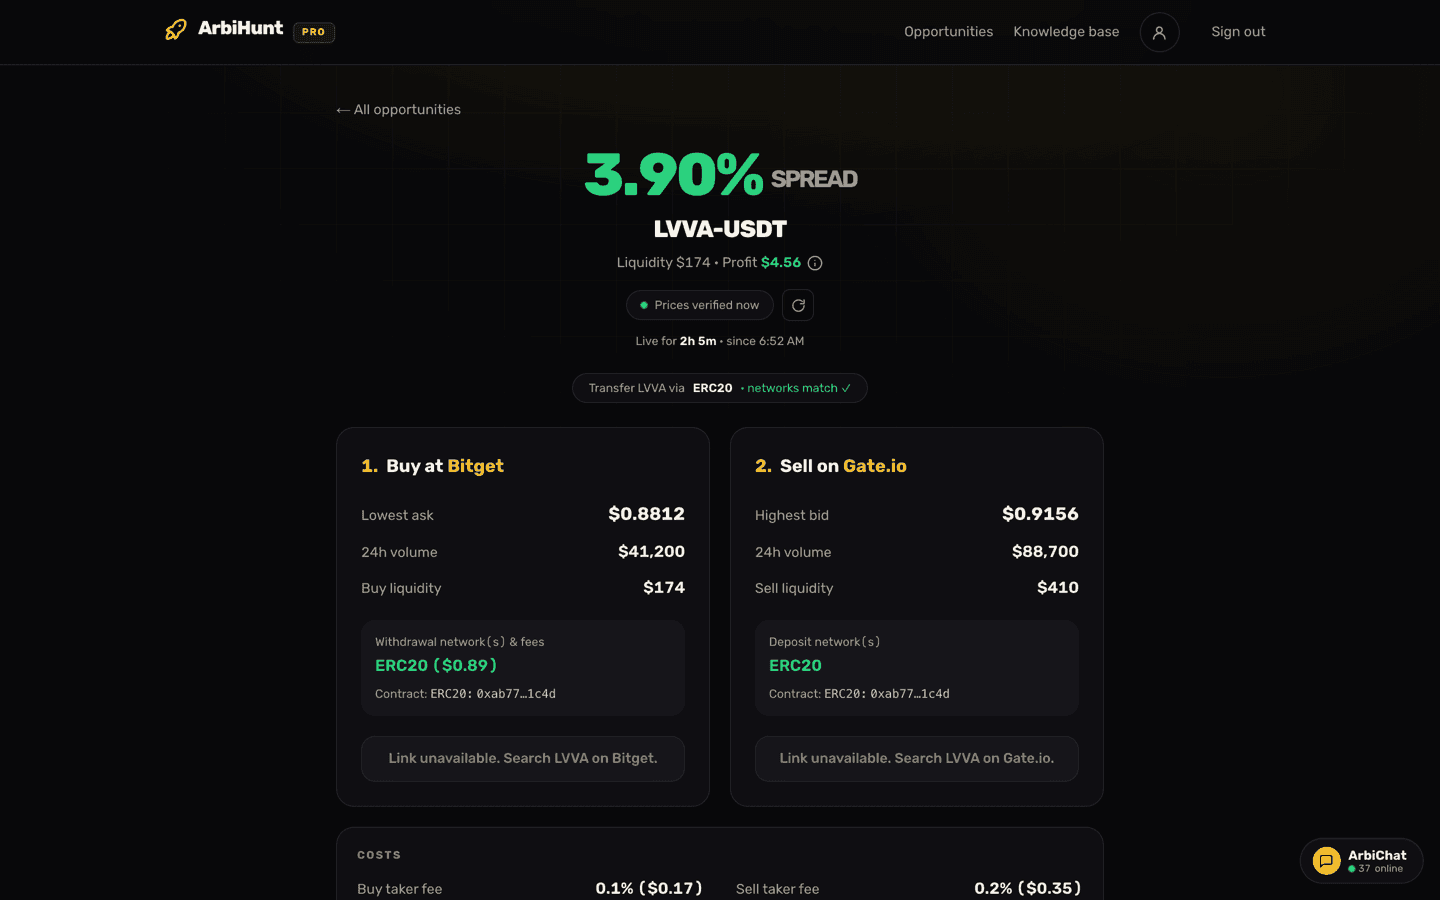
Around 0.1% per leg is the working assumption, and it is the default the free arbitrage calculator ships with. It is a starting point, not a law. The two opportunity pages pictured in this article carry 0.05%, 0.1% and 0.2% legs between them, and the two legs of the same trade frequently do not match.
Four things move your number:
| What moves it | Effect on the taker rate you pay |
|---|---|
| 30-day trading volume tier | Higher volume usually steps you down a VIP tier and cuts the rate |
| Holding or paying in the exchange's own token | Many venues discount fees for holders, or when the fee is charged in their token |
| The specific market | New listings and promo pairs can carry temporary zero-fee or elevated rates |
| Maker vs taker side | The maker rate is the cheaper of the two, and it is the one arbitrage rarely gets |
The only rate that matters is the one your account pays on that venue today. Check it in the exchange's own fee page before you size up, because a venue you assumed was 0.1% and is actually 0.2% quietly doubles the cost of that leg.
How two taker fees compound against a thin spread
Fees are charged on the value of each fill, so they multiply rather than add. The gross spread you need just to get back to zero on the trading fees alone is:
breakeven spread = 1 / ((1 - buy fee) x (1 - sell fee)) - 1
| Buy leg | Sell leg | Gross spread you must clear |
|---|---|---|
| 0.05% | 0.05% | 0.1001% |
| 0.05% | 0.2% | 0.2505% |
| 0.1% | 0.1% | 0.2003% |
| 0.2% | 0.2% | 0.4012% |
The compounding is a rounding hair at these sizes, so the mental shortcut of "just add the two legs" is fine. The part worth internalising is the ratio. Against a 0.5% gross spread, two 0.1% legs consume 40% of the gap and two 0.2% legs consume 80% of it, before the coin has moved anywhere. Two mismatched legs at 0.05% and 0.2% land in between at roughly half the gap.
The number to carry in your head
Two taker fills at 0.1% cost you about 0.2% of your trade size. Any gross spread near or below that is a loss dressed as an opportunity, and that is before the transfer fee, slippage, or the gap moving while your coin is in transit.
And the trading fee is only the first cost. The flat network fee to move the coin between exchanges comes on top, which is why the same spread can be profitable at $5,000 and a loss at $200. That mechanic is covered in Withdrawal fees and networks explained, and the whole cost stack in Spread vs. net profit.
Where ArbiHunt shows the taker rate for each leg
Open any opportunity and scroll to the Costs card. It lists the taker fee ArbiHunt used for the buy leg and for the sell leg separately, because they usually differ.
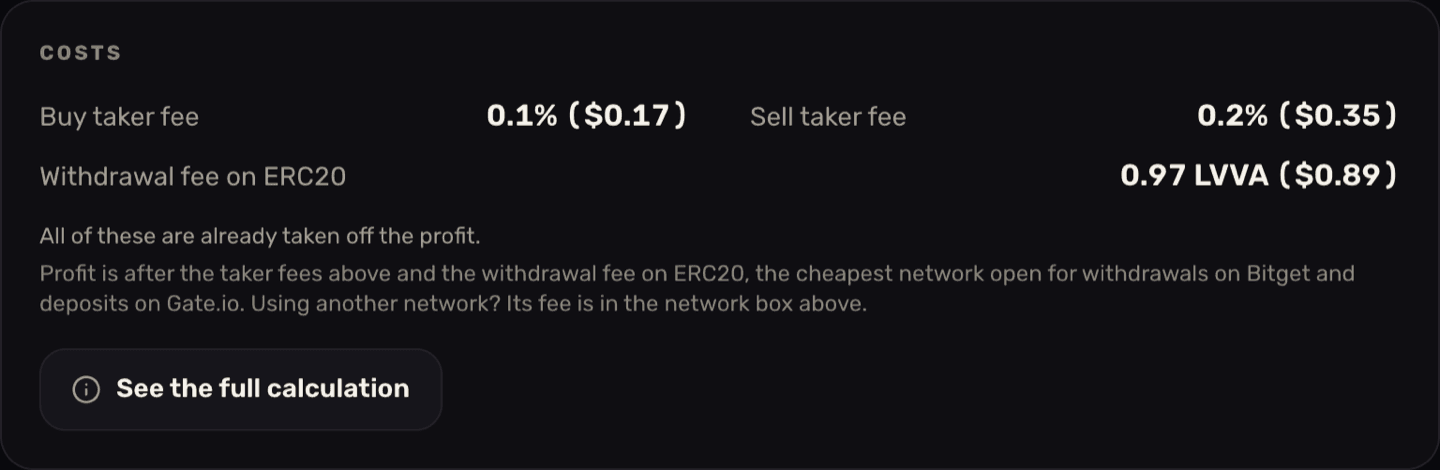
Two things to read carefully on the opportunity page:
- The large percentage at the top of an opportunity is labelled Spread. It is the raw gap between the two venues before any costs, so neither taker fee is in it.
- The profit dollar figure is the post-cost number. It accounts for the taker fee on both legs at the rates on the Costs card, the order-book depth actually behind the trade, and the withdrawal fee. PRO members can tap the (i) beside it to see each taker fee as its own line.
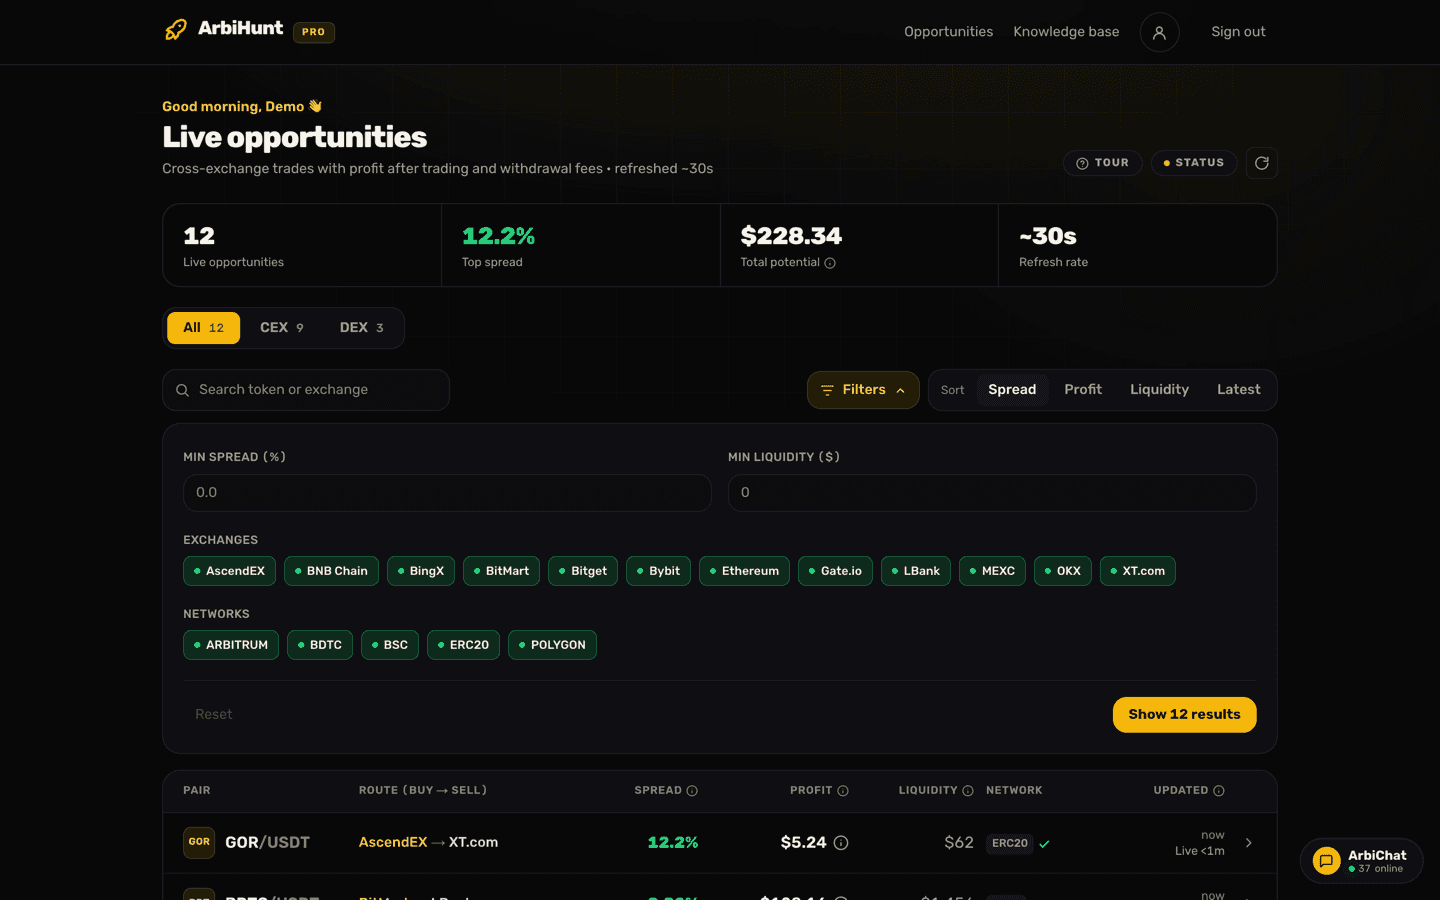
The board itself has no fee column, so the per-leg rate lives on the detail page. Understanding the opportunity details walks through the rest of that screen, and How to read the ArbiHunt dashboard covers the columns you see before you open one.
See the real cost on every route
ArbiHunt scans 26 exchanges roughly every 30 seconds and nets both taker legs, the withdrawal fee and live order-book depth into every opportunity, so you can see what a trade leaves you before you commit to it.
Work out your own breakeven before you size the trade
Your rates are not the ones in an example. Put your real numbers into the free arbitrage calculator and read the third tile.
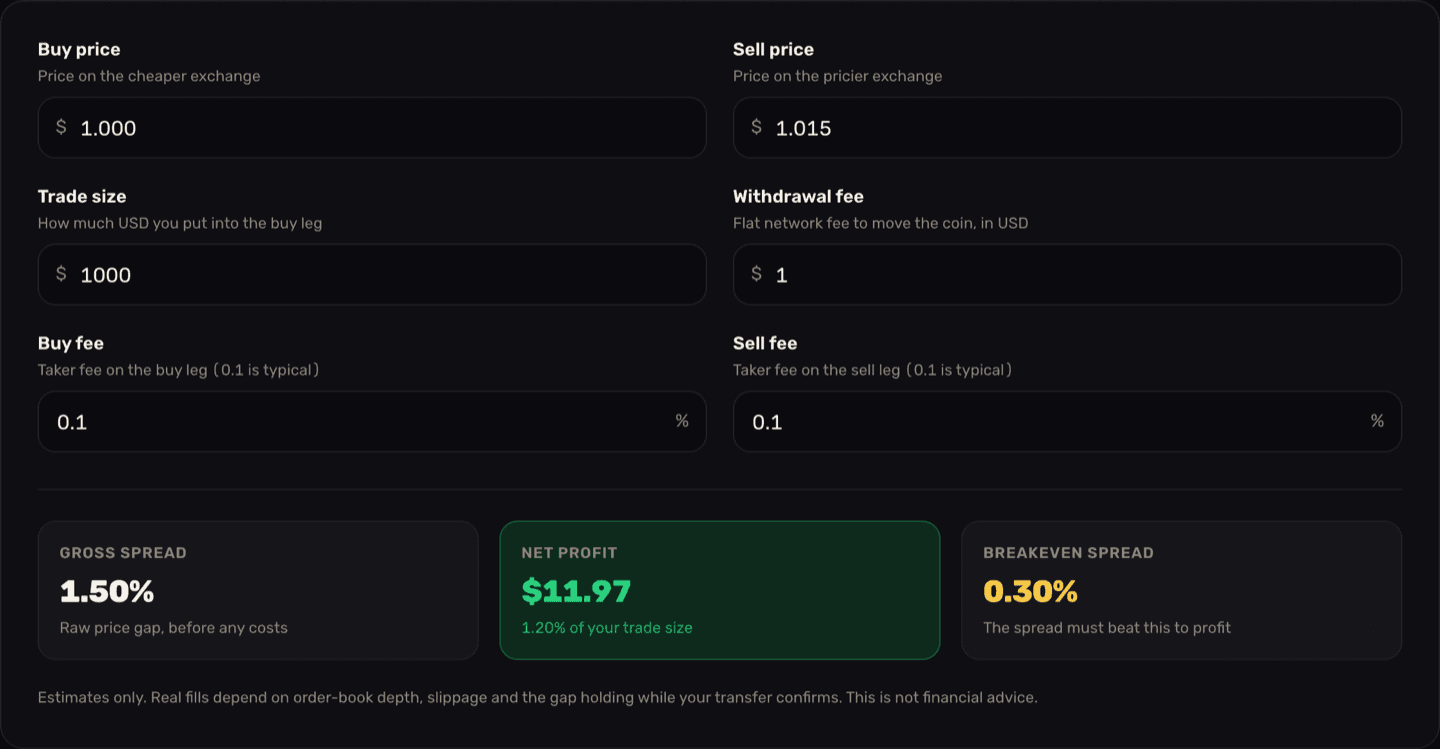
Read the run in the screenshot: a 1.50% gross spread on $1,000, with 0.1% taker fees on both legs and a $1 network fee, keeps $11.97, 1.20% of the trade size. The 0.30% breakeven is the two taker legs (about 0.20%) plus the flat $1 withdrawal, which is another 0.10% at this size. Push the same trade to $10,000 and that withdrawal fee falls to 0.01% of the position, while the taker fees stay at 0.20% no matter how large you go. That is the practical difference between a percentage cost and a flat one, and it is why trading fees dominate on large trades and withdrawal fees dominate on small ones.
When trying to be a maker is a trap
Paying half the fee is genuinely tempting. Here is why chasing it usually costs more than it saves:
- The gap closes while you wait. You are trying to capture a mispricing that other people are also watching. A resting order converts a live edge into a lottery ticket.
- You get filled at the worst moment. A resting buy limit tends to fill when sellers are pushing price down toward it. The fill you wanted arrives exactly as the reason for the trade evaporates. That is adverse selection, and it is structural, not bad luck.
- One leg fills and the other does not. Now you are not running an arbitrage. You are holding an unhedged directional position in a small-cap token, which is a completely different risk than the one you signed up for.
- The clock is not yours. These gaps are time-sensitive by nature; the app warns that most last no more than a few minutes. An order that needs an hour to fill is playing a different game.
There is one setup where posting can make sense: both exchanges are already funded, so there is no transfer in the middle, you are working a pair with real depth, and you treat "no fill" as an ordinary outcome rather than a failure. The pre-funded version of the trade is covered in How to execute a crypto arbitrage trade.
Price it at the taker rate
Assume both legs are taker fills when you decide whether a trade is worth doing. If it only clears breakeven at maker rates, it does not clear breakeven. Any maker fill you happen to get is upside, never the plan.
Before you trade
- ArbiHunt is an information tool. It finds, costs and ranks opportunities. It never connects to your exchange accounts, never asks for API keys, never holds funds and never places a trade. Every order is yours.
- Fee rates change, and so does your VIP tier. Confirm the live taker rate inside each exchange before sizing up.
- The transfer network must be supported on both the sending and receiving exchange, and deposits and withdrawals must be open on it.
- The same ticker can be a different, migrated or wrapped contract on another exchange. PRO shows the contract address on both legs; compare them on the exchanges' own deposit pages before you send anything.
No spread is guaranteed. Opportunities are time-sensitive, may close within seconds, and not all of them are executable at size. This is not financial advice, and crypto trading carries risk.
See it live
ArbiHunt scans 26 exchanges in real time and ranks every spread by true net profit, after fees, withdrawals and live liquidity.